
Launch task with Amazon ECS and Bottlerocket
Amazon Elastic Container Service (ECS) is a powerful service for managing containerized applications on Amazon Web Services (AWS). It provides a simple way to launch and scale containerized applications, making it an ideal choice for organizations looking to deploy their applications quickly and efficiently. In this blog post, we’ll explore how to launch a container (task) with Amazon ECS and Bottlerocket, a new open-source operating system designed specifically for running containers.
Introduction
Overview of Amazon ECS and Bottlerocket
Bottlerocket is a lightweight, secure, and efficient operating system that’s optimized for running containers. It’s designed to provide a minimal, immutable, and easy-to-update operating system for running container workloads at scale. By using Bottlerocket with Amazon ECS, you can easily launch and manage your containerized applications with minimal overhead.
Benefits of using Bottlerocket with Amazon ECS (Difference between general ECS-optimized AMI)
The major difference is that the Bottlerocket was designed as secure and lightweight operating system to run container workload. Here comes out few considerations you need to know when using the OS:
- The root filesystem in Bottlerocket is marked as read-only and cannot be directly modified by userspace processes.
- By default, you will not be able to SSH into the Bottlerocket instance.
Start with Bottlerocket
Creating a Task Definition
To get started with launching a task using Amazon ECS and Bottlerocket, you’ll first need to create a task definition that describes your containerized application. If you are already familiar with Amazon ECS, there is no difference for the task definition between using general ECS-optimized AMI and Bottlerocket AMI. If you have a task definition, you can skip to the next part.
A task definition generally is a blueprint to describe the specification and how you will run your container(s). On Amazon ECS, container(s) should be encapsulated as the running unit called Task, and this is the reason why we need to have a task definition. In the task definition, you can specify the image, resources, environment variables, and other settings that your application needs to run. Once you’ve created your task definition, you can then create a task, which is a running instance of your application.
Let’s create a task definition first. Simply go to task definition page and create a new task definition with JSON:
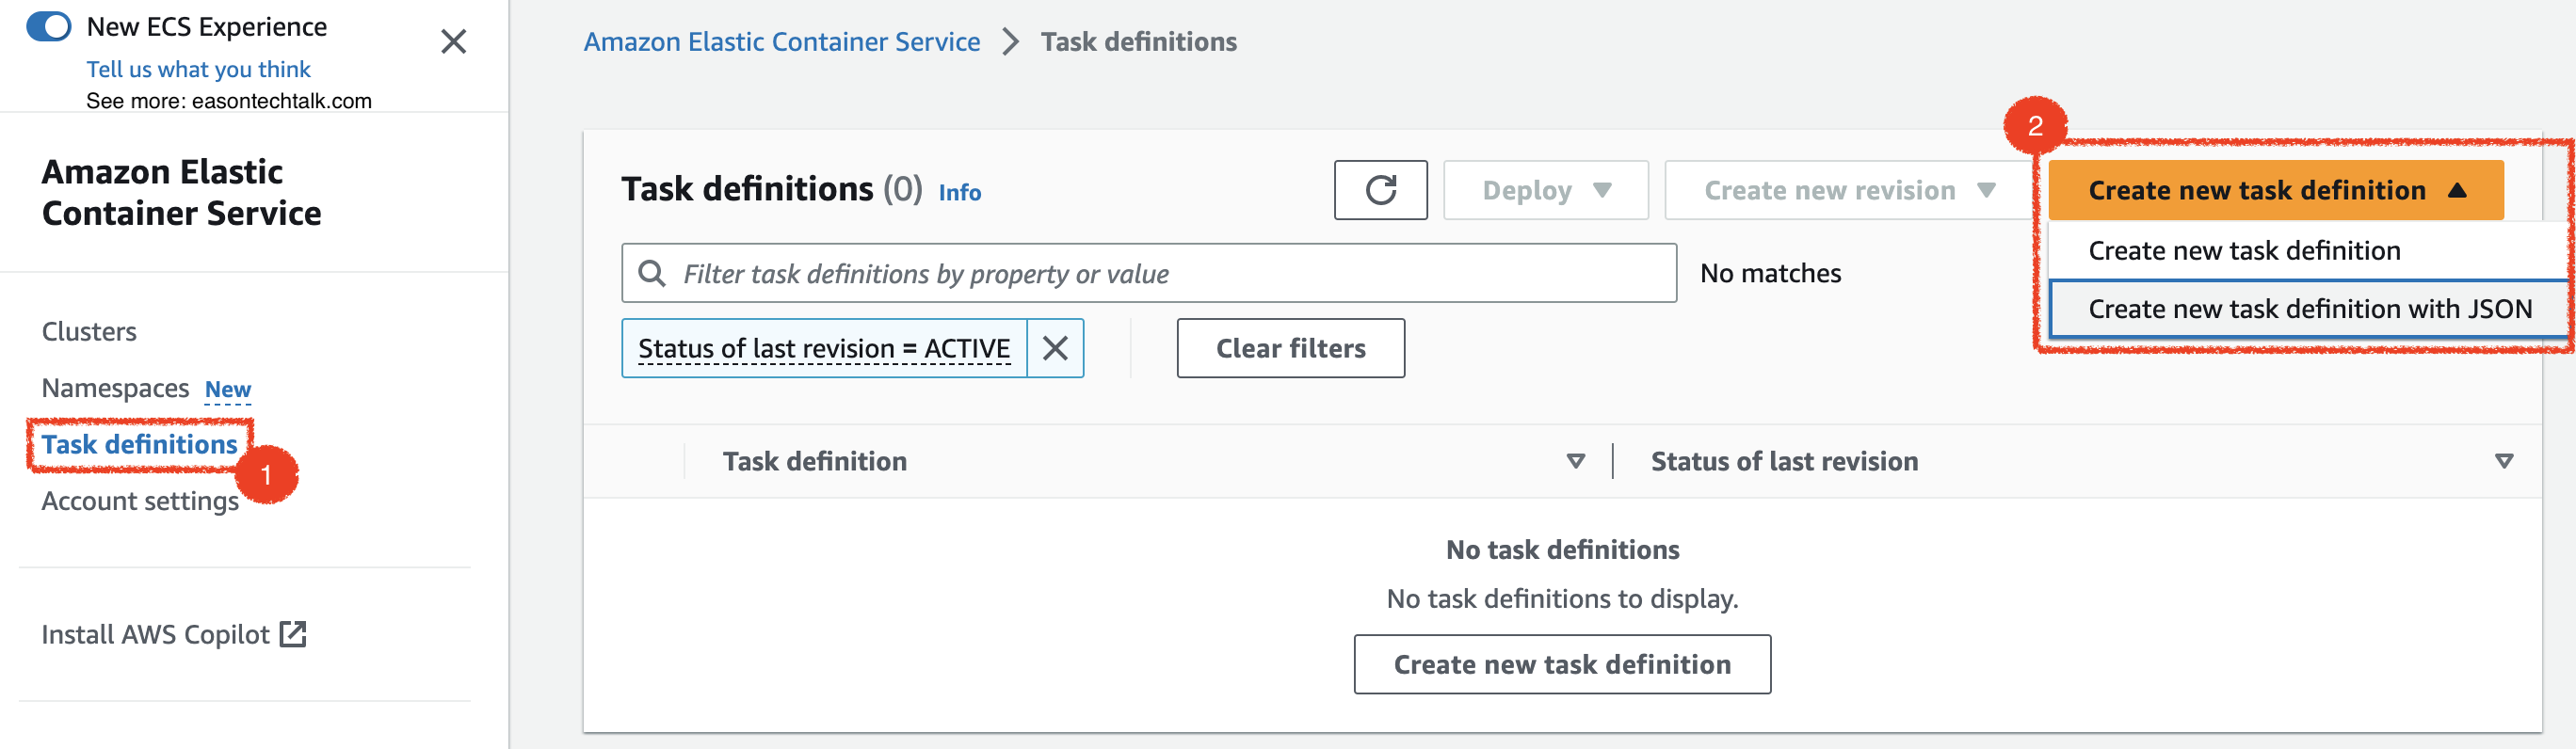
In this sample, it describe to launch the the container image (easoncao/ecs-demo-app), request 128 vCPU unit and 128 MB memory unit. It also set the hostPort as 0 to map the container port 80, which can expose the container service to the dynamic port when running the task on my Bottlerocket instance:
{
    "containerDefinitions": [
        {
            "name": "demo",
            "image": "easoncao/ecs-demo-app:latest",
            "cpu": 128,
            "memory": 128,
            "portMappings": [
                {
                    "containerPort": 80,
                    "hostPort": 0,
                    "protocol": "tcp"
                }
            ],
            "essential": true
        }
    ],
    "family": "easontechtalk-demo",
    "requiresCompatibilities": [
        "EC2"
    ]
}
Creating an ECS cluster
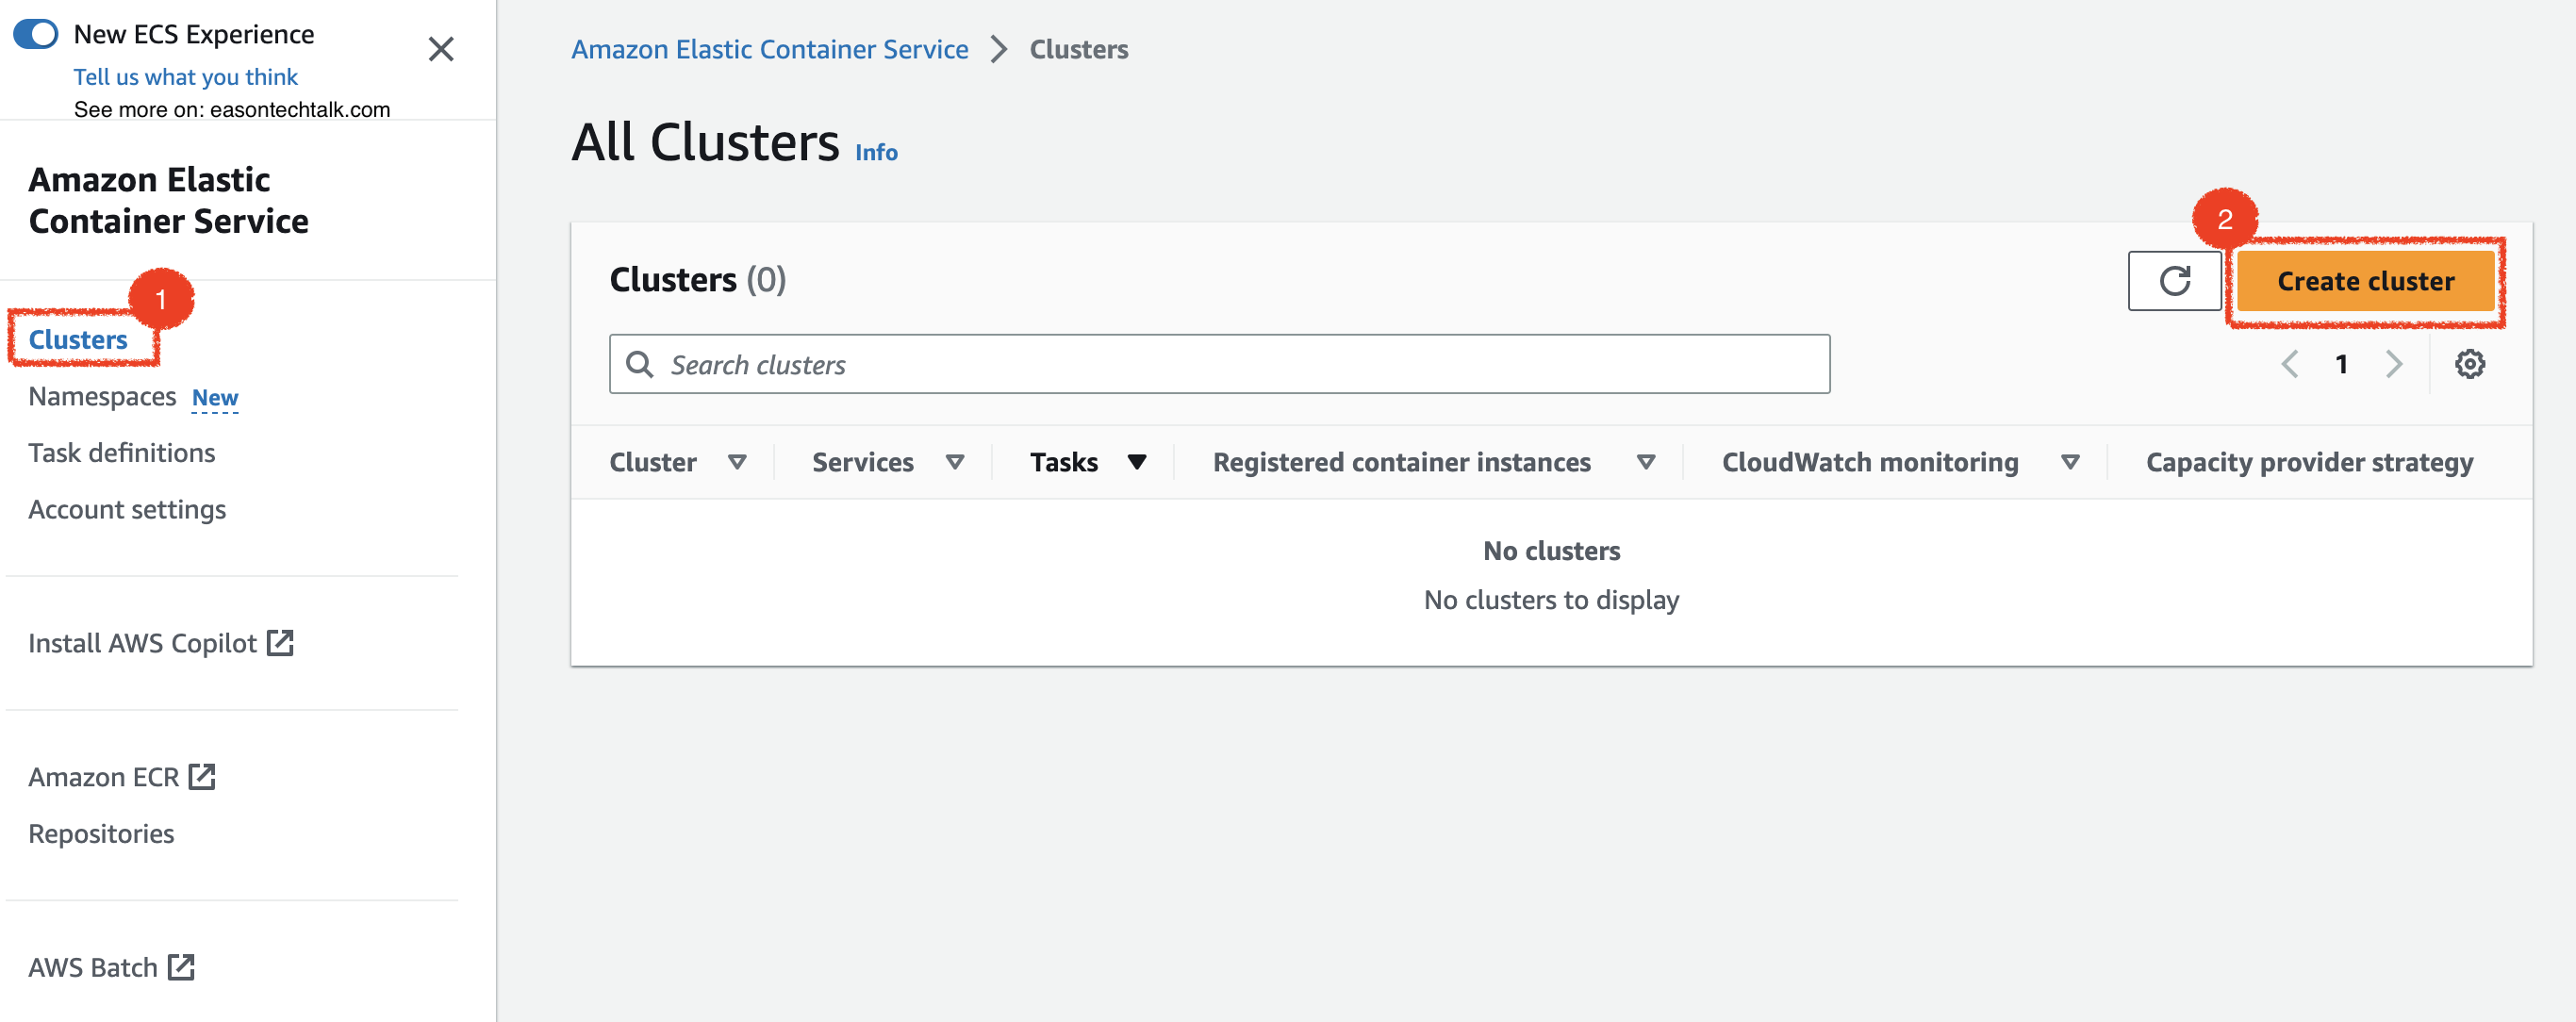
To launch your task with Bottlerocket, you’ll need to create an ECS cluster and register your Bottlerocket instances with it. The new ECS console simplified the experience for creating a new cluster. You can go to the ECS Console, select Clusters and click the Create cluster button, follow the instruction to complete the creation:
If you prefer to have CLI experience, you also can use AWS ECS CLI command1. The following command will create an ECS Cluster easontechtalk-bottlerocket in eu-west-1 region:
aws ecs create-cluster --cluster-name easontechtalk-bottlerocket --region eu-west-1
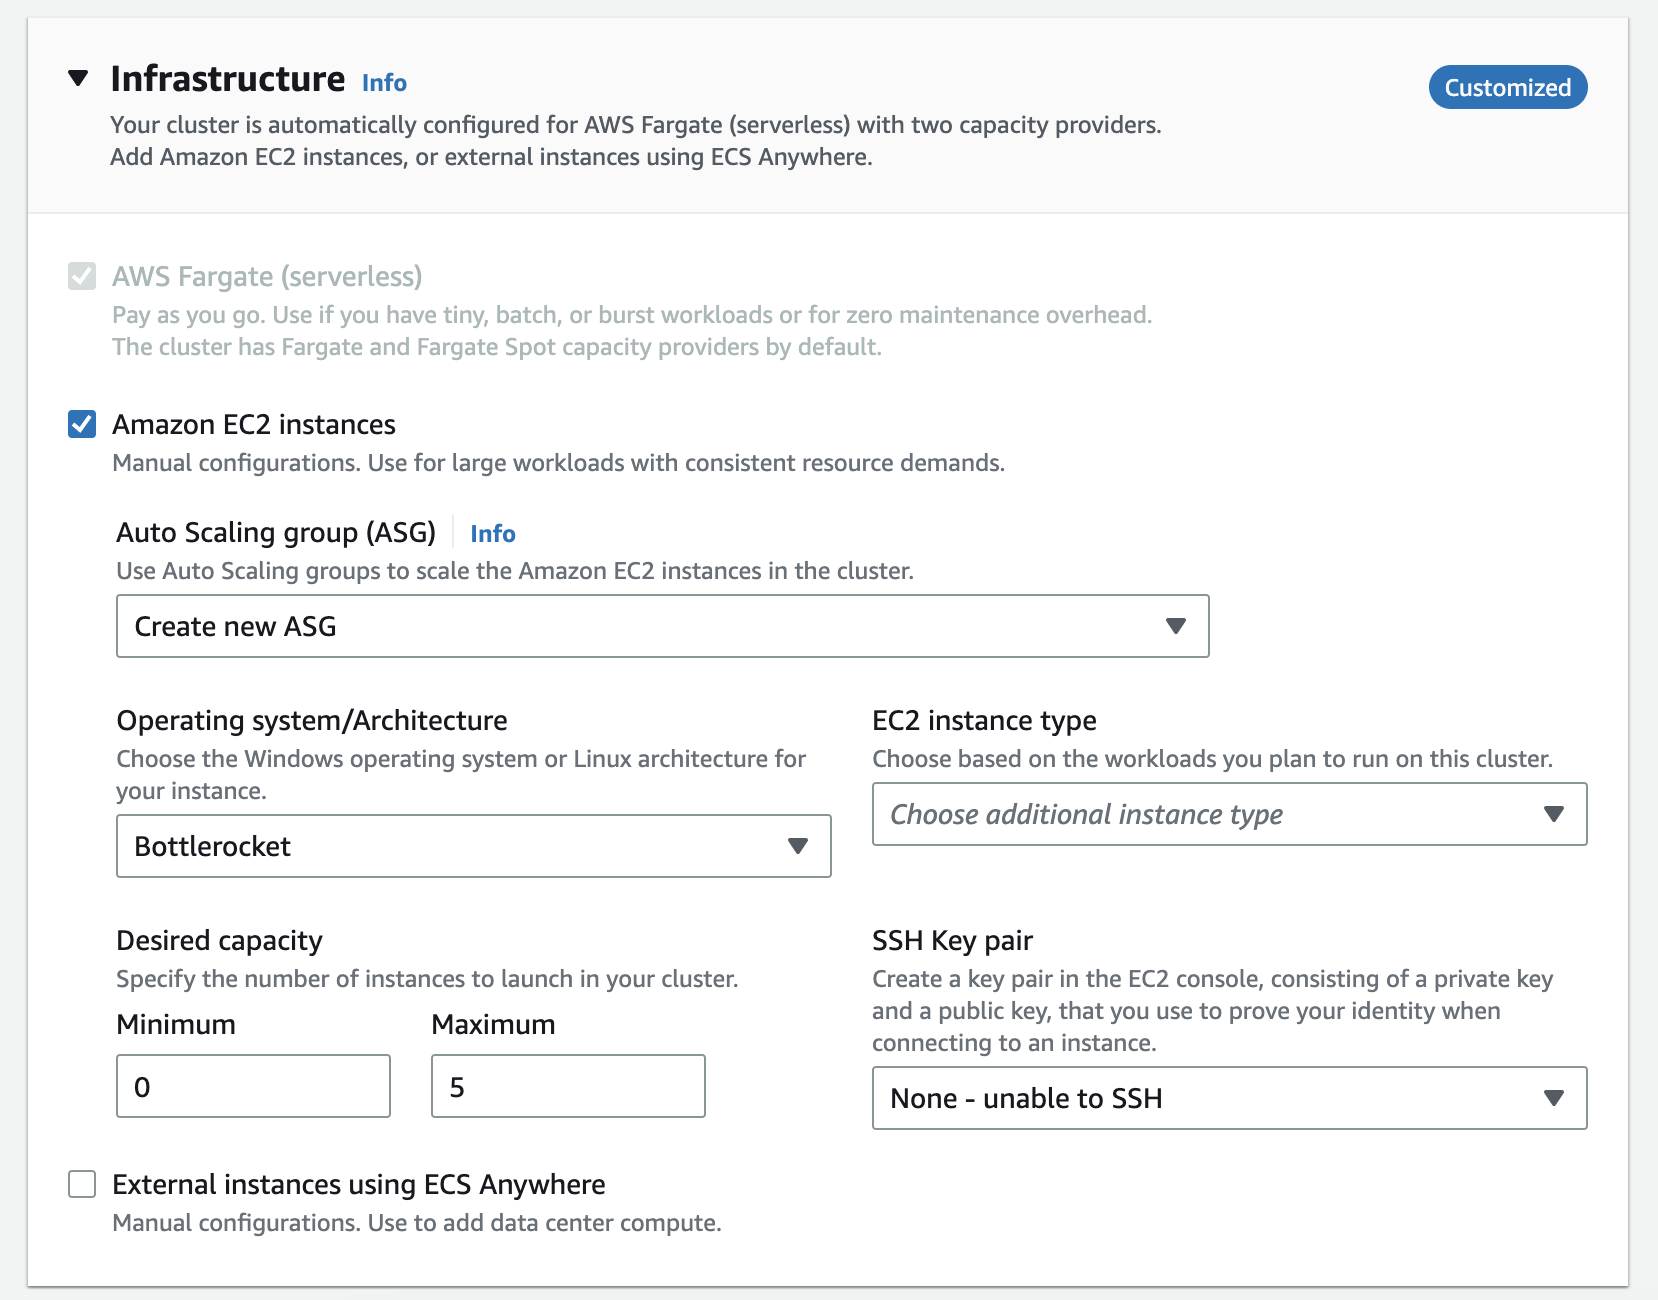
If you are using AWS Console, under Infrastructure section, you can check Amazon ECS instances option to configure EC2 Auto Scaling Group and launch the instances. When you select Create new ASG, you will have option for Operating system/Architecture, which can choose Bottlerocket as your operating system. But if you would like to launch the instances by yourself, you can create them later.
Registering Bottlerocket instances
If you prefer to create and manage instances on your own, you can simply find the Bottlerocket AMI ID and launch it. To find the corresponding AMI ID, you can use AWS CLI command or use the AMI quick link2 to retrieve the AMI ID value:
https://console.aws.amazon.com/systems-manager/parameters/aws/service/bottlerocket/aws-ecs-1/x86_64/latest/image_id/description?region=<REGION>#
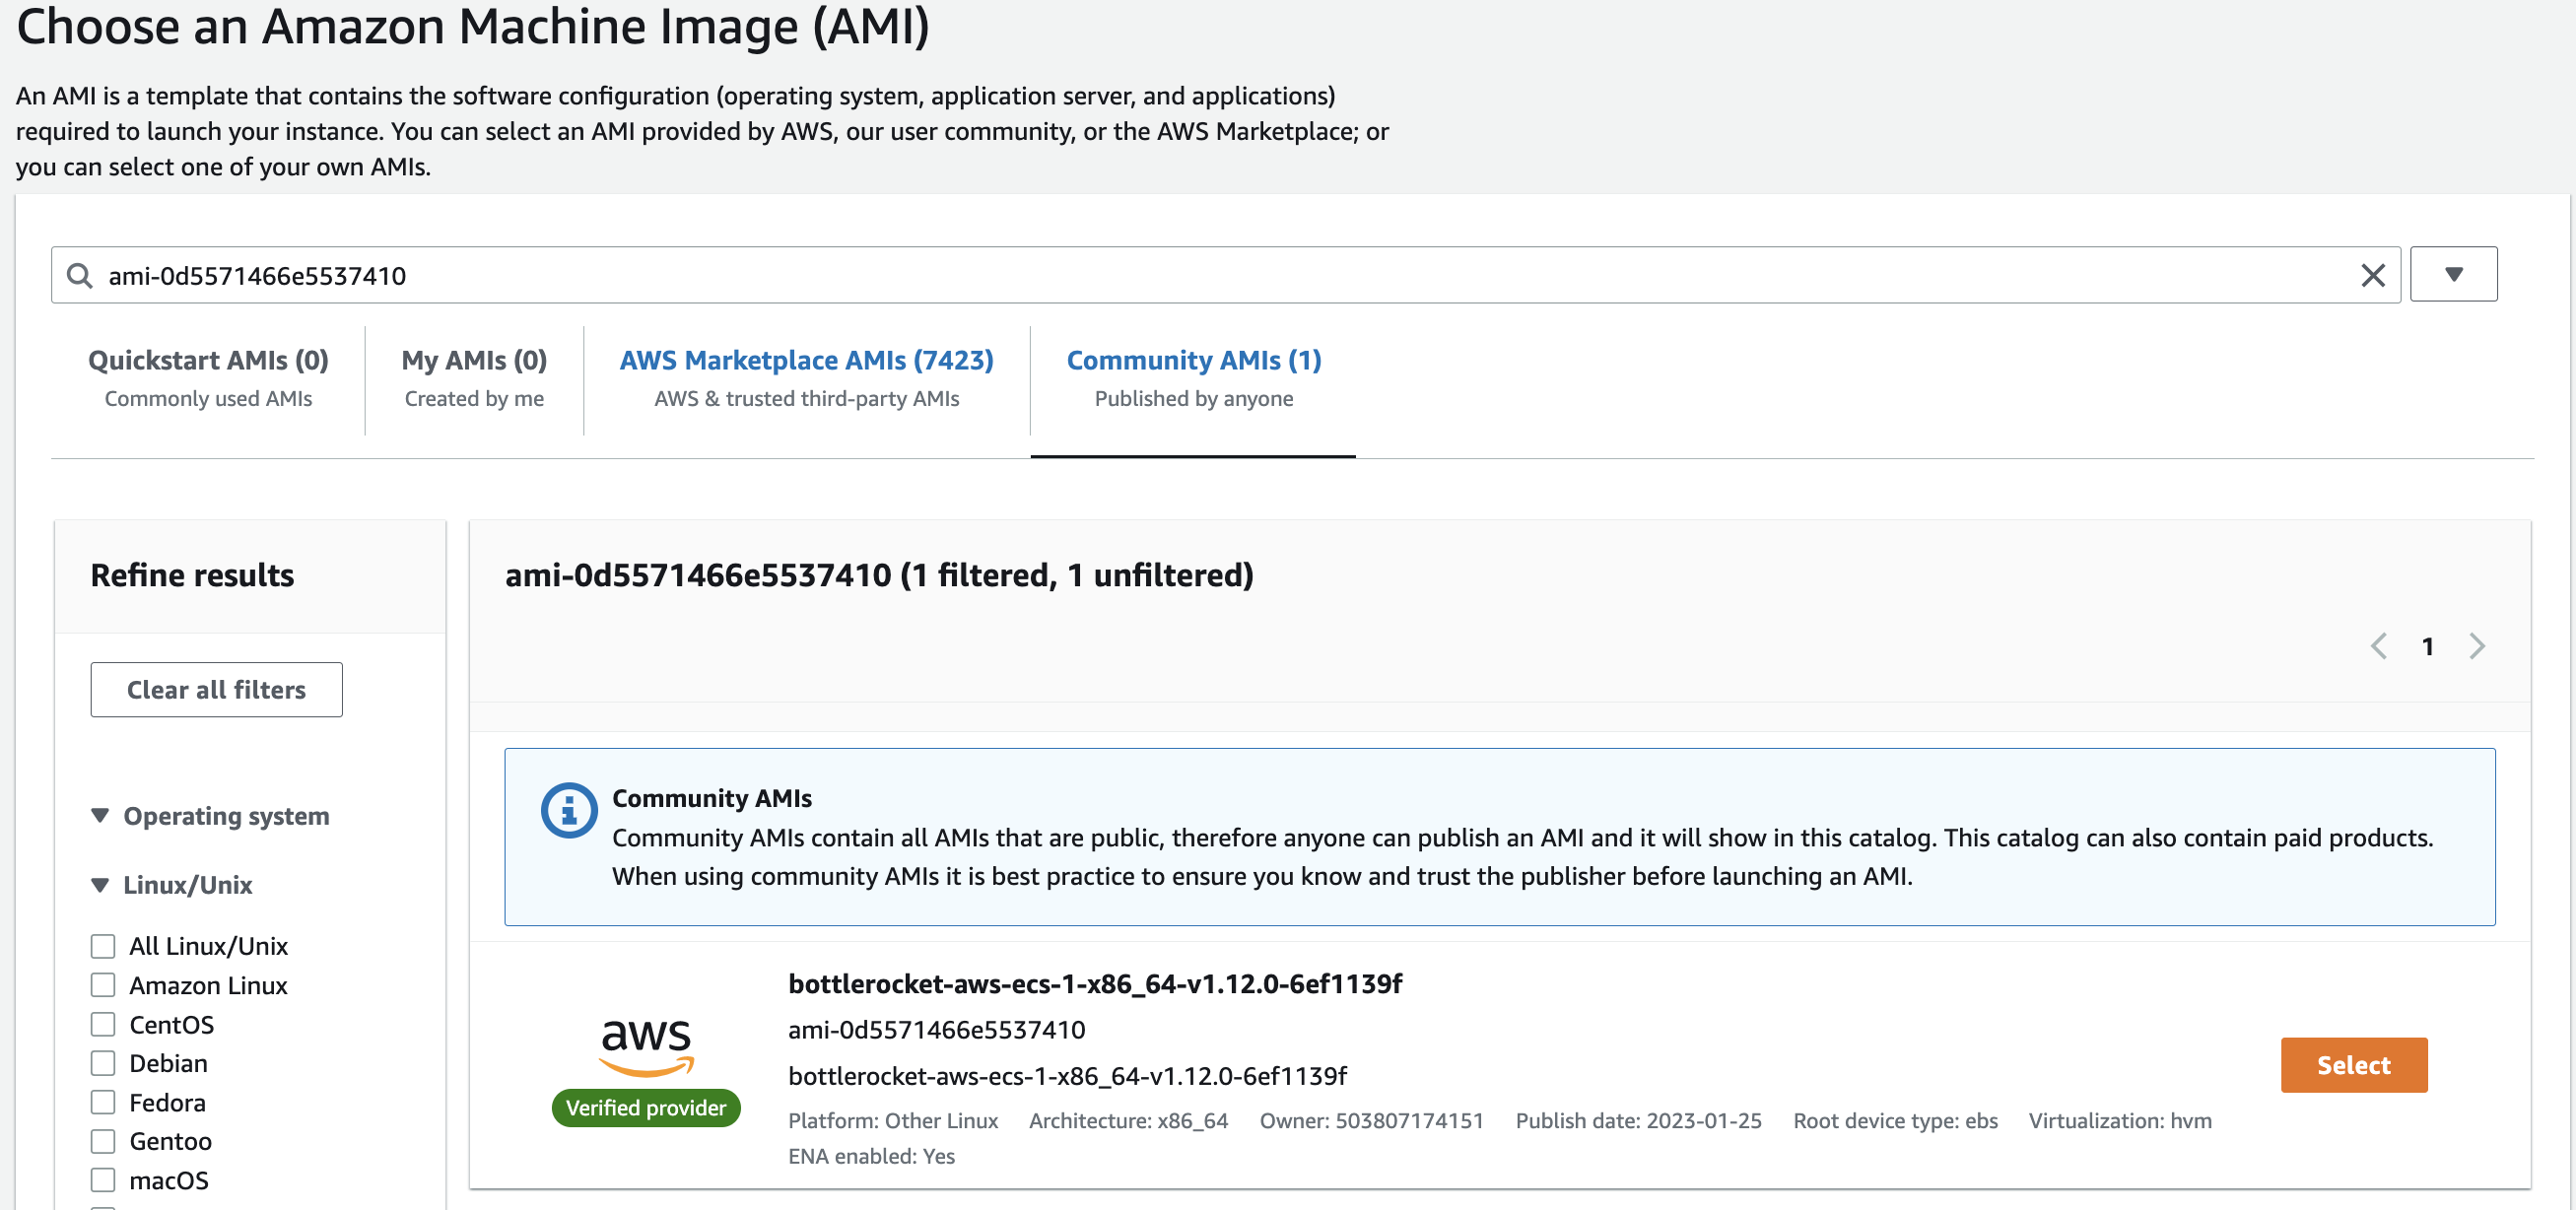
For example, here is the example to get the latest Bottlerocket x86_64 AMI ID in eu-west-1 region. I will get the AMI ID ami-0d5571466e5537410:
(AWS CLI)
aws ssm get-parameter --region eu-west-1 \
    --name "/aws/service/bottlerocket/aws-ecs-1/x86_64/latest/image_id" \
        --query Parameter.Value --output text

# Output
ami-0d5571466e5537410
Once we got the AMI ID for the Bottlerocket OS, the next step is to launch the EC2 instance and register the instance to the ECS cluster through the bootstrapping process. Now you can go to launch EC2 instance page and select the AMI:
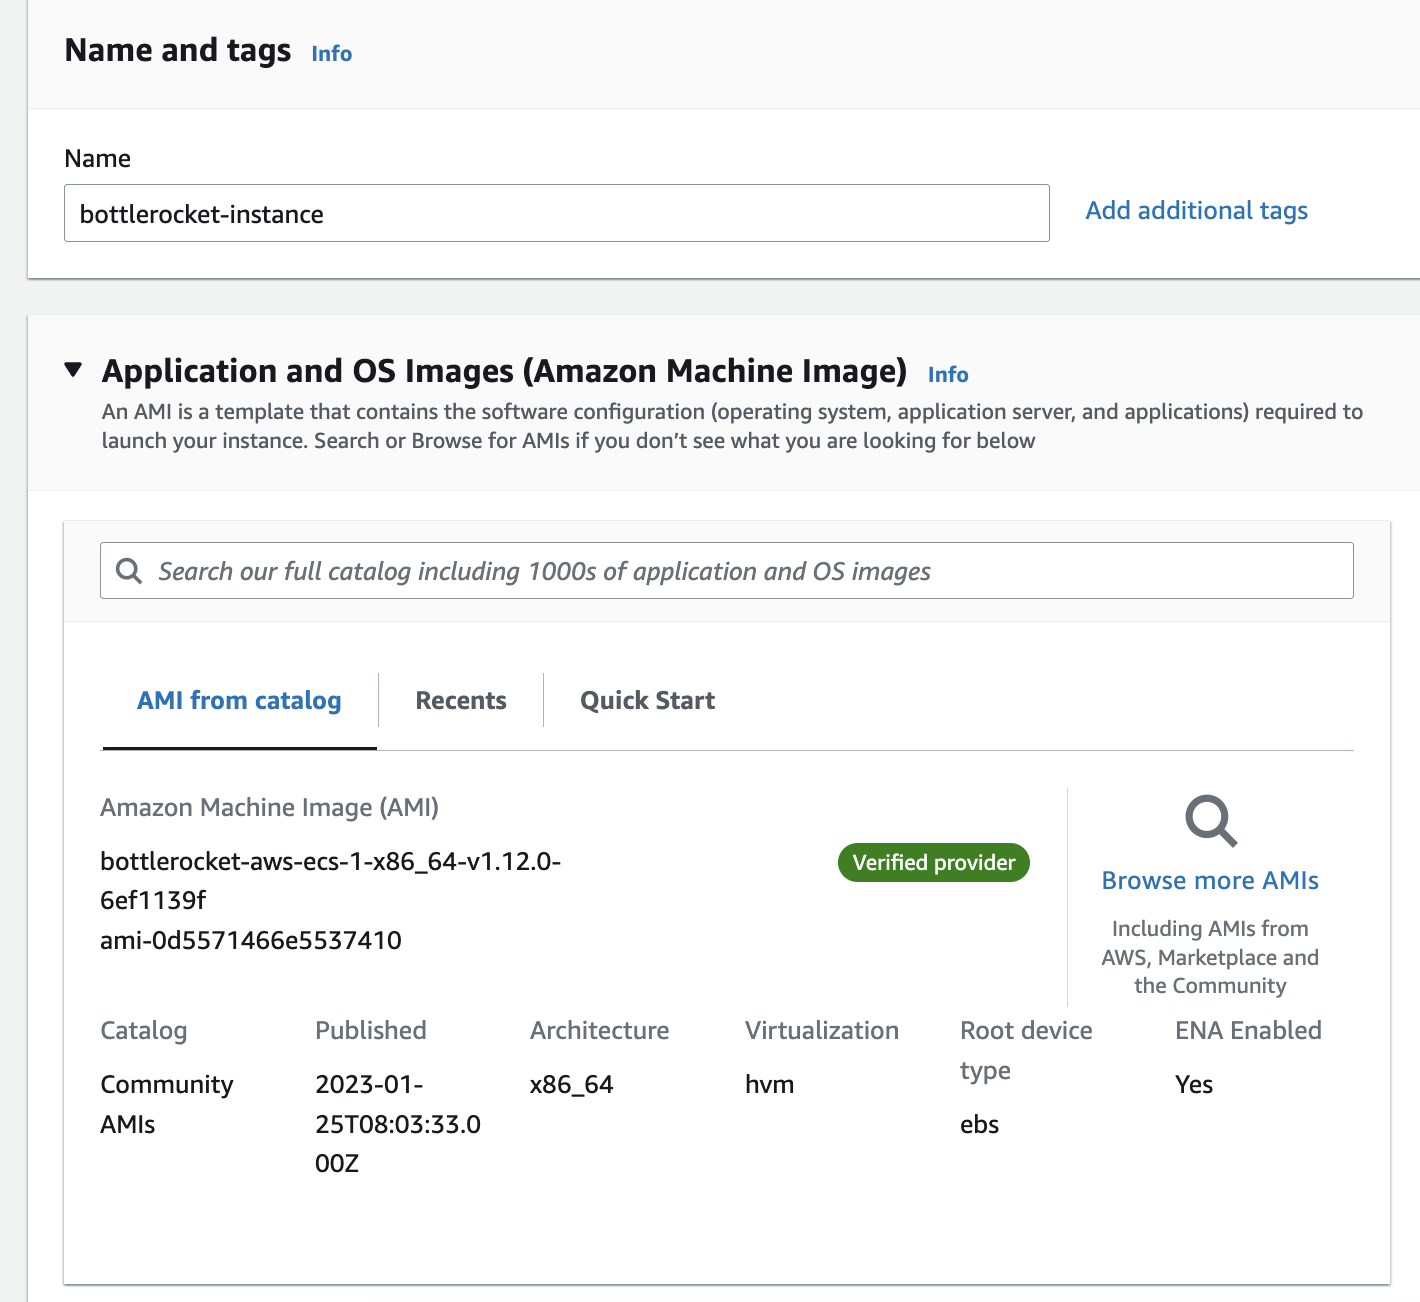
Make sure you select the IAM Profle (IAM Role) to allow this instance can have permission to register to your ECS Cluster (Usually is ecsInstanceRole. See more about how to check the IAM Role3). If you know how to register container instances by using general ECS-optimized AMI, the difference here is the UserData content:
(General ECS-optimized AMI)
#!/bin/bash
echo "ECS_CLUSTER=CLUSTER_NAME" >> /etc/ecs/ecs.config
(Bottlerocket AMI)
[settings.ecs]
cluster = "CLUSTER_NAME"
Replace CLUSTER_NAME as your own cluster name. In this example, I paste my cluster name (easontechtalk-bottlerocket) with the UserData in the Advanced details section:

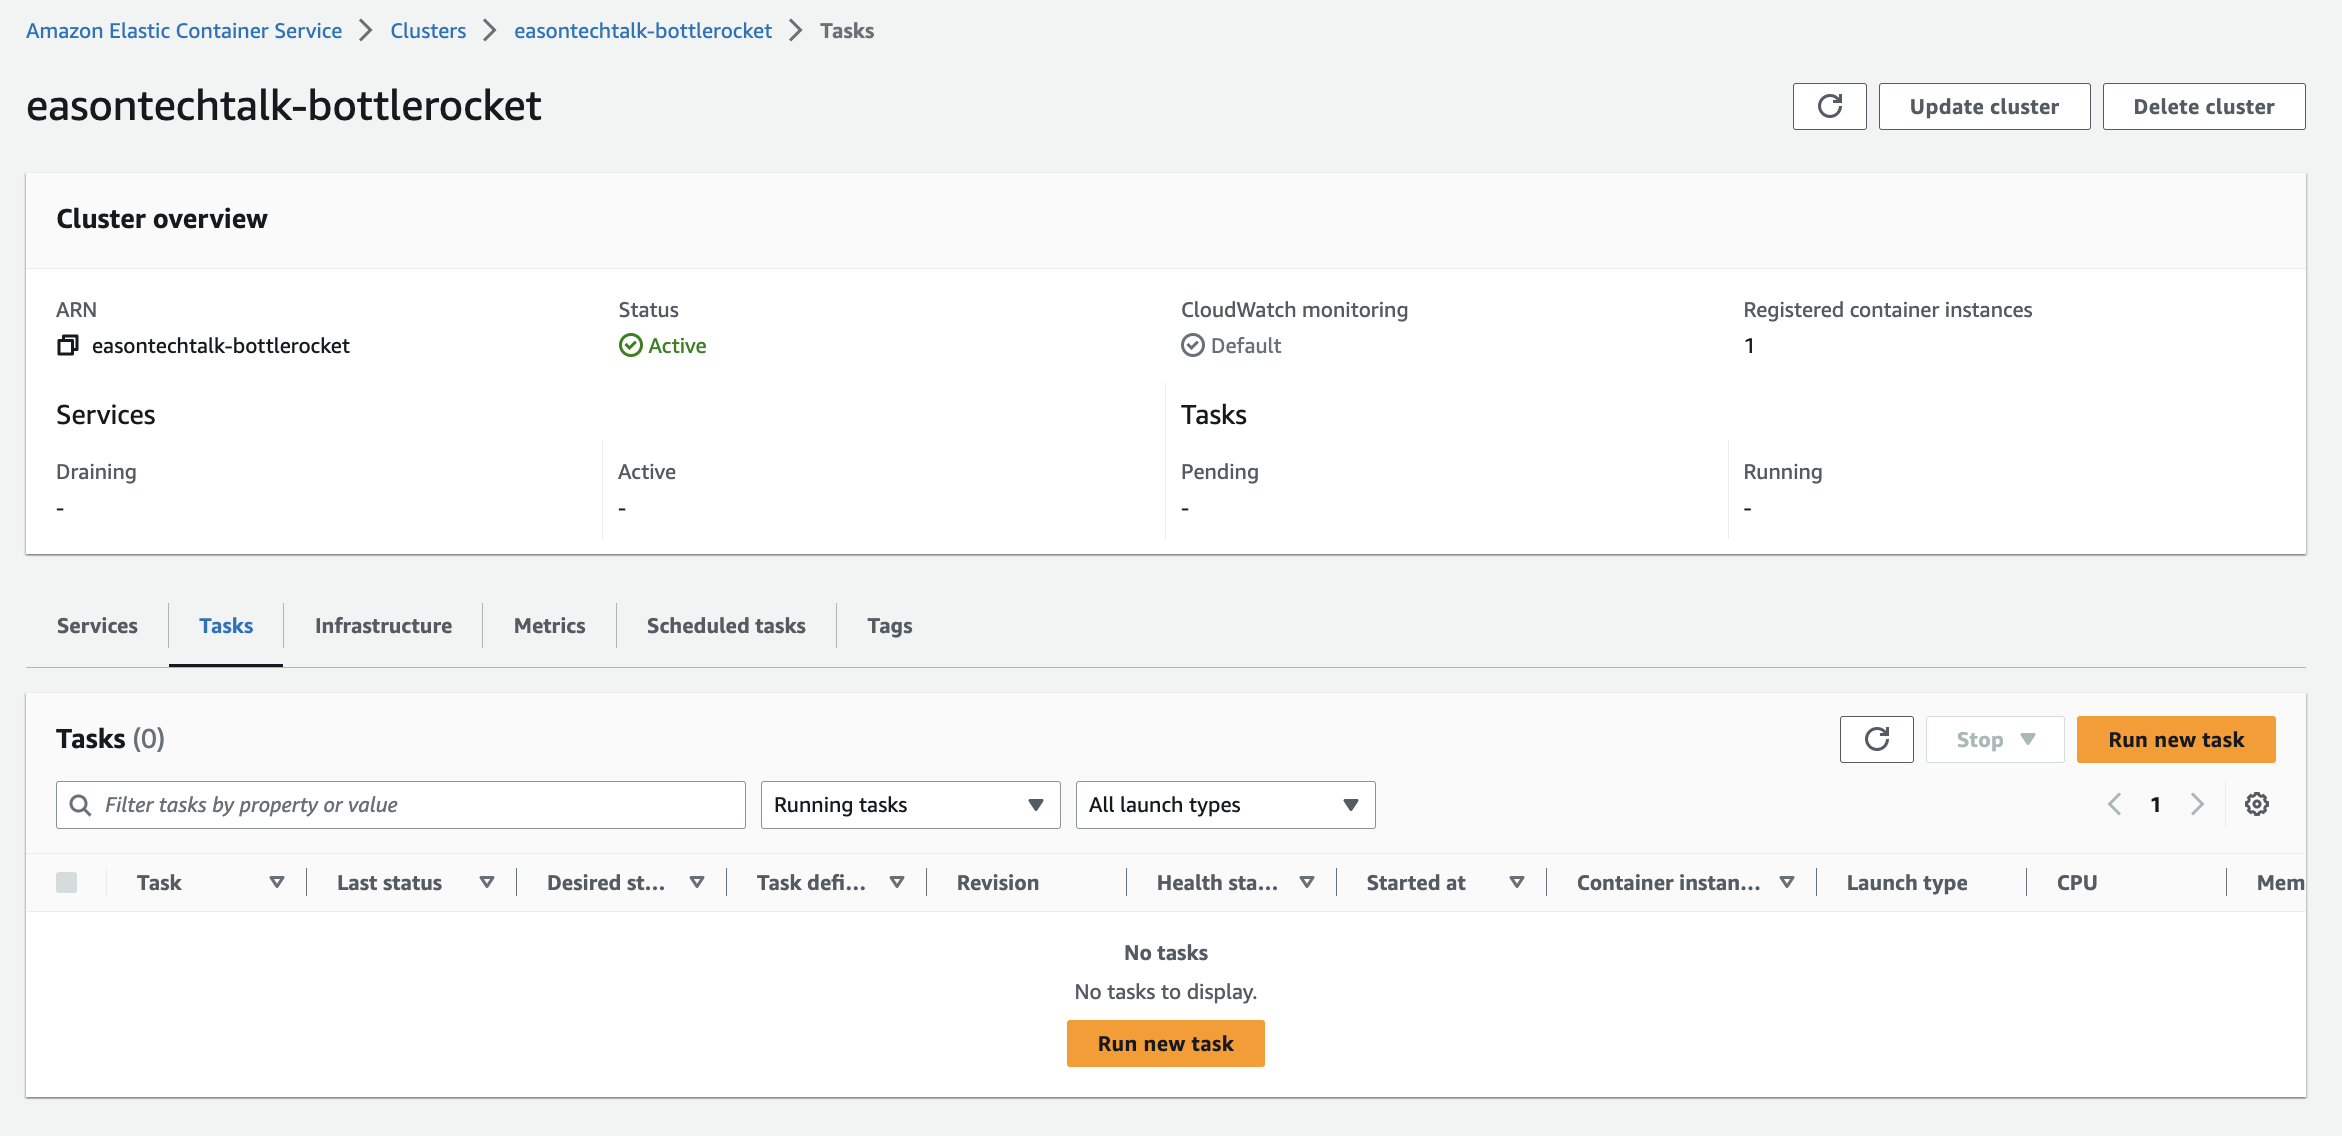
Once your EC2 instance is up and running, it will automatically register to the ECS Cluster and you can view the detail under the cluster infrastructure tab:

Launching a Task with Bottlerocket
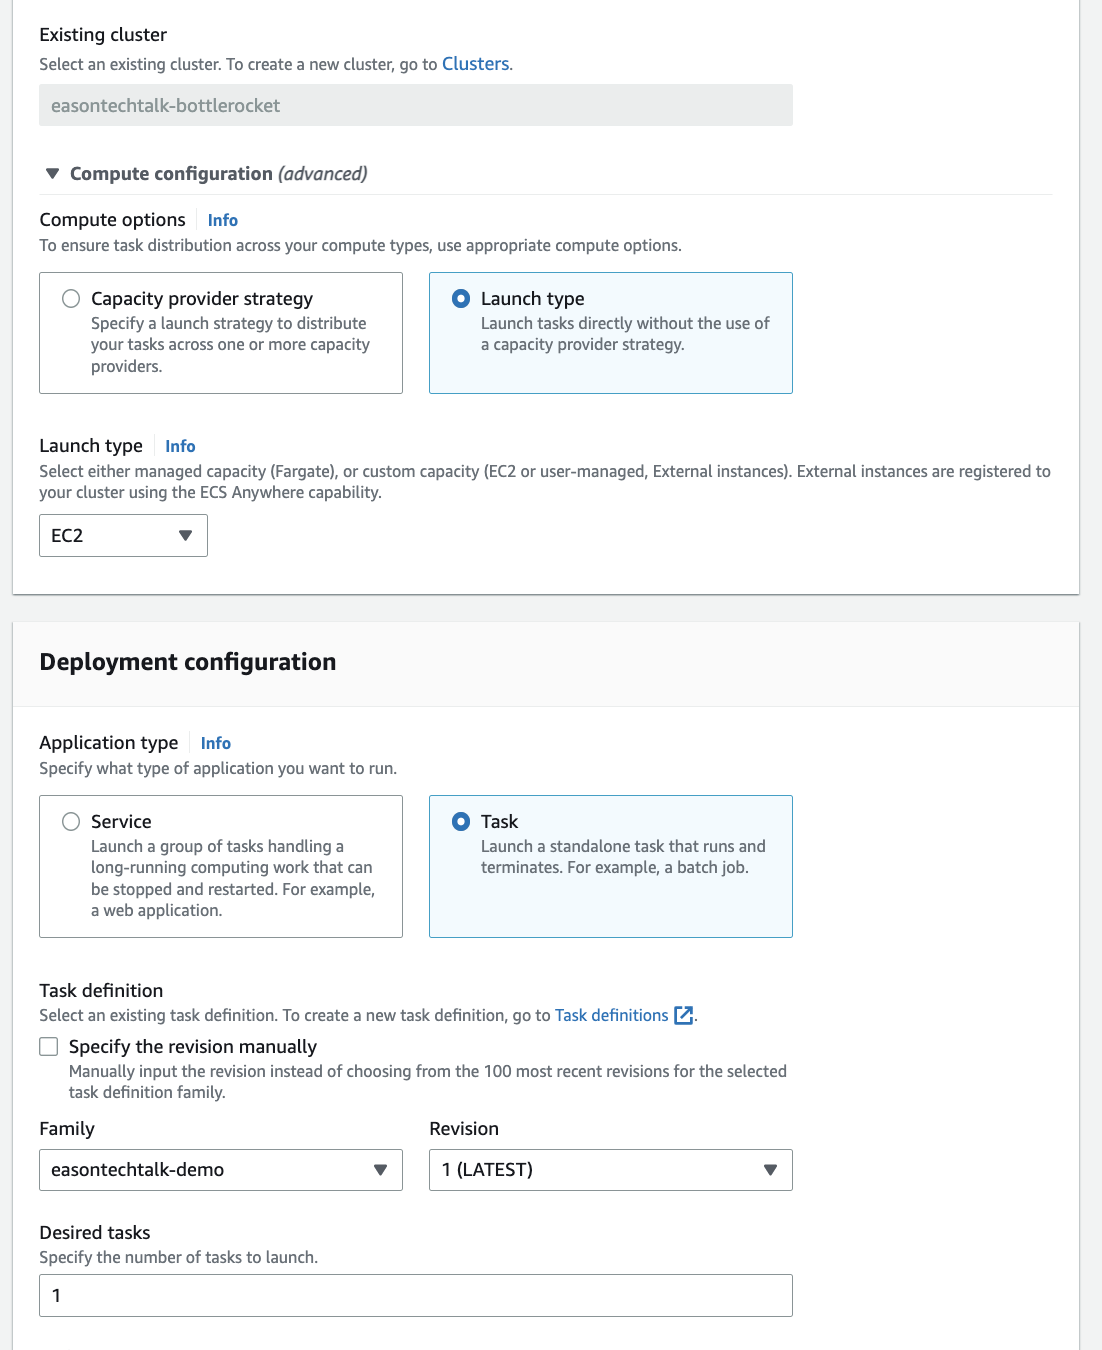
Now you can run the task in ECS console and specify the detail:
I choose the task definition revision that I created in the previous step, and run one task:
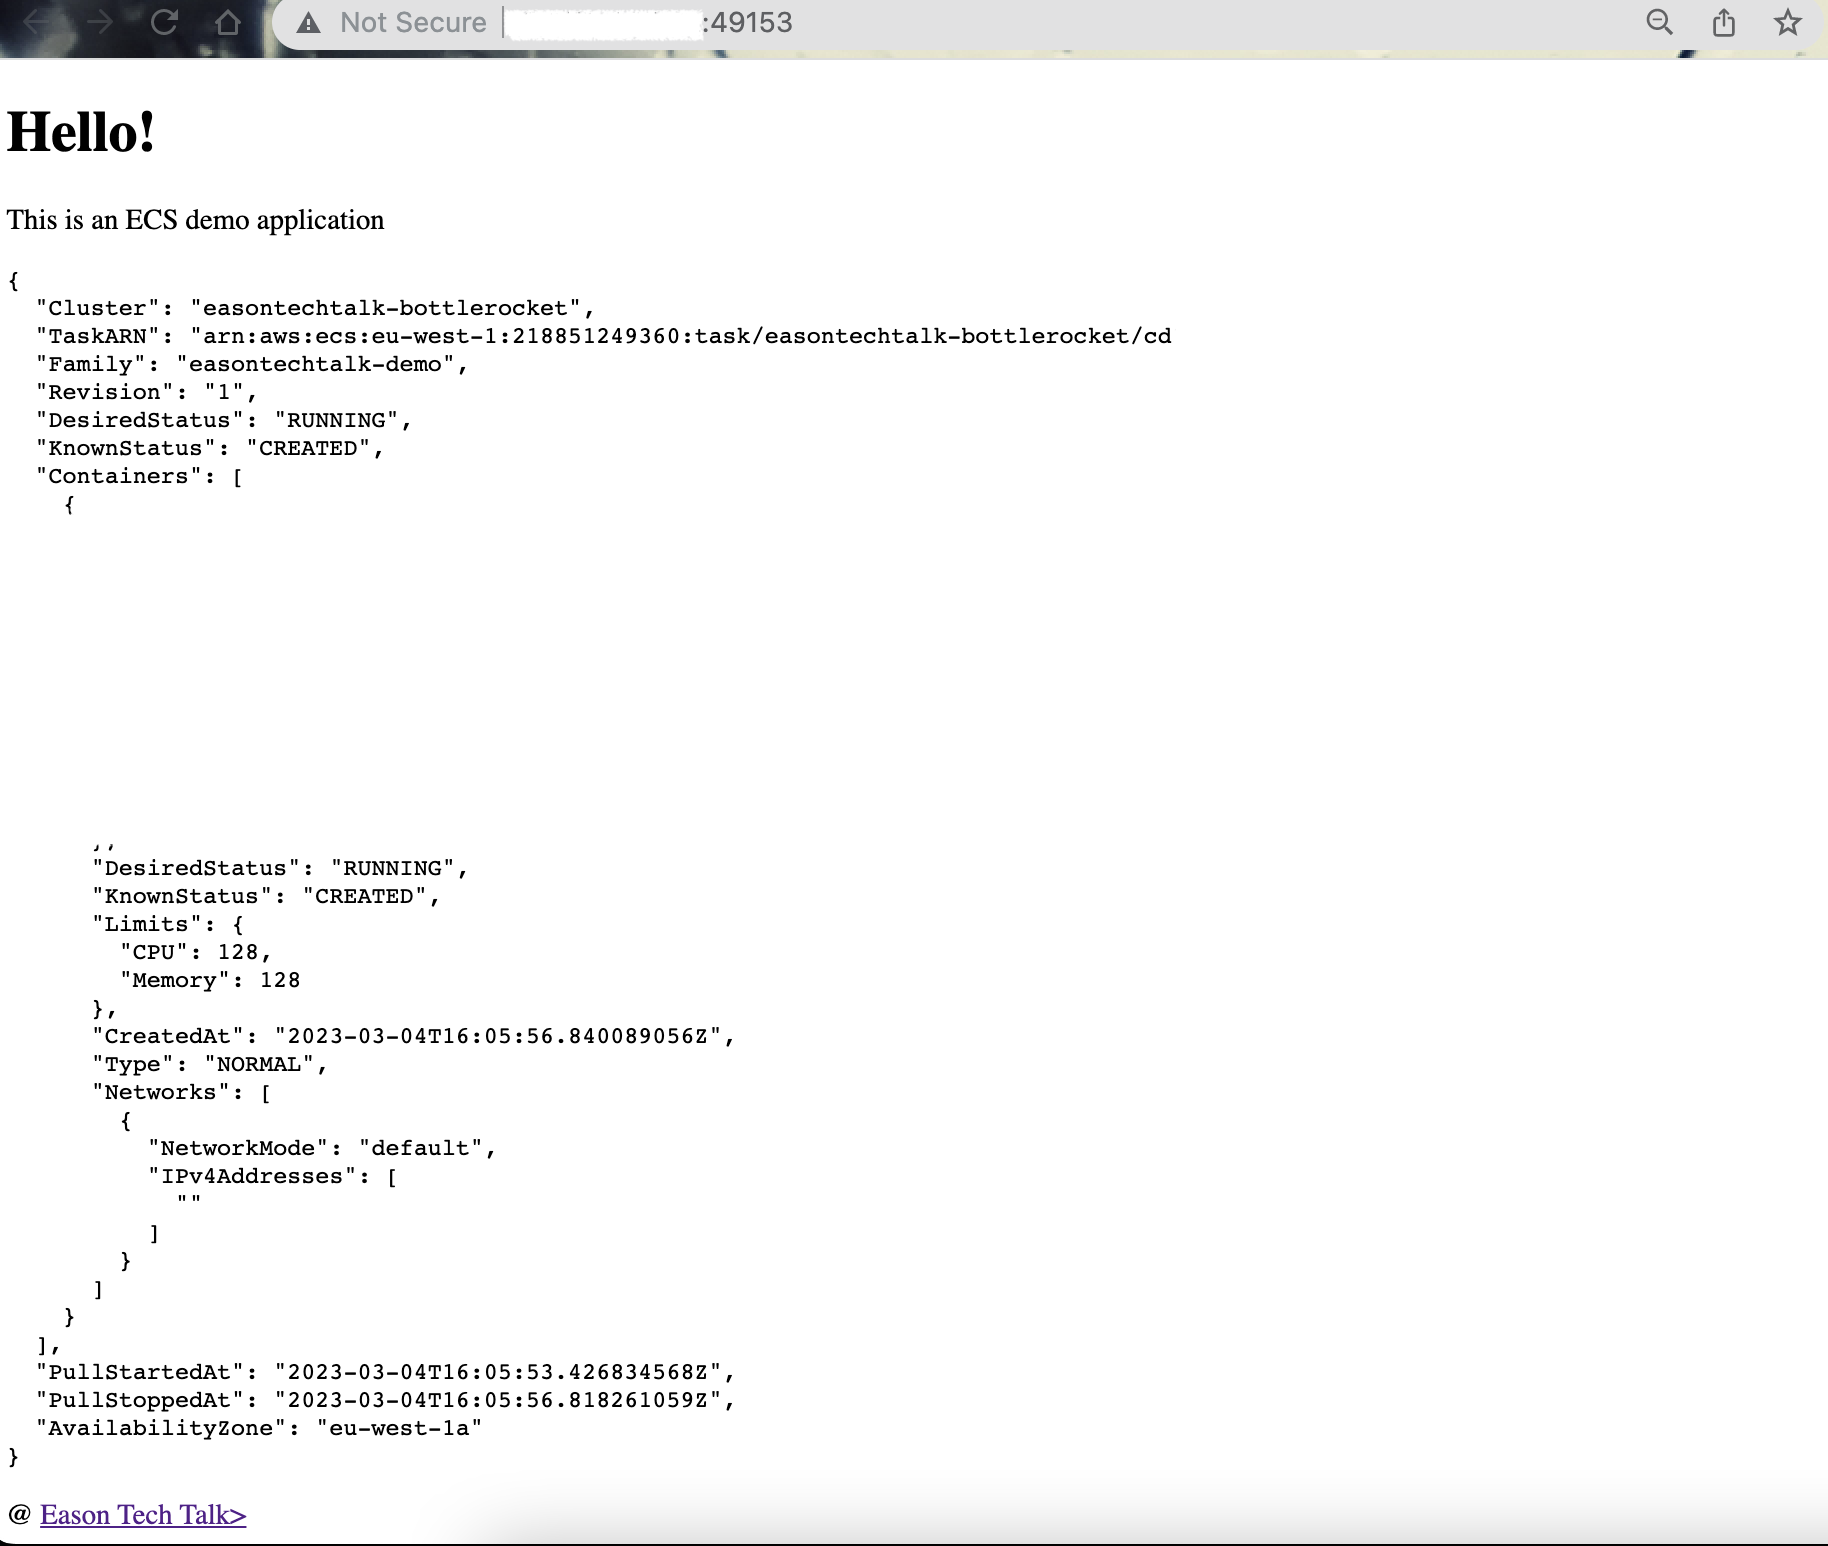
Once your task is launched, you can use the ECS console or CLI to monitor its status. You even can click the task detail and see the container detail to get the network binding information. In this example, my container is deployed on Bottlerocket instance and expose the service port 49153:

Because the ECS task is using the default container bridge network. I can visit the instance’s Public IP and use the dynamic port that ECS assigned (49153) to access my container. Make sure you open the security group rule when you are trying to connect. This demo application will show the task detail in the web page:
Conclusion
In summary, launching a task with Amazon ECS and Bottlerocket is a simple and efficient way to deploy containerized applications on AWS. By using Bottlerocket’s lightweight and secure operating system, you can streamline your deployment process and reduce your infrastructure overhead.
References